DingTalk authentication

Organizations that use DingTalk can let users sign in to CloudDM with their organization-managed accounts. CloudDM manages DingTalk as a separate SSO provider.
The provider screenshots in this guide show its Chinese interface.
How it works
- The integration uses OAuth 2.0.
- When users choose DingTalk on the CloudDM sign-in page, their browser opens the DingTalk sign-in page.
- After sign-in, DingTalk redirects the browser back to CloudDM with an authorization code.
- CloudDM exchanges the code for user information and completes sign-in.
Configure the provider
- Sign in to CloudDM with permission to manage integrations.
- Open Integrations > SSO and click Add.
- Select DingTalk.
- Enter AppKey and AppSecret, then choose a Default Role.
- Click Add.
Verify sign-in
Sign out and select DingTalk on the CloudDM sign-in page. Verify that authorization returns you to CloudDM and that a first-time user receives the configured default role.
DingTalk app setup
info
You can use the same app for sign-in and DingTalk approvals, or configure them separately. Refer to the provider's official documentation for current field names and screens.
Before you begin
- Sign in to the DingTalk Open Platform and select your organization.
- Obtain developer permissions if you do not already have them.
Configure the app
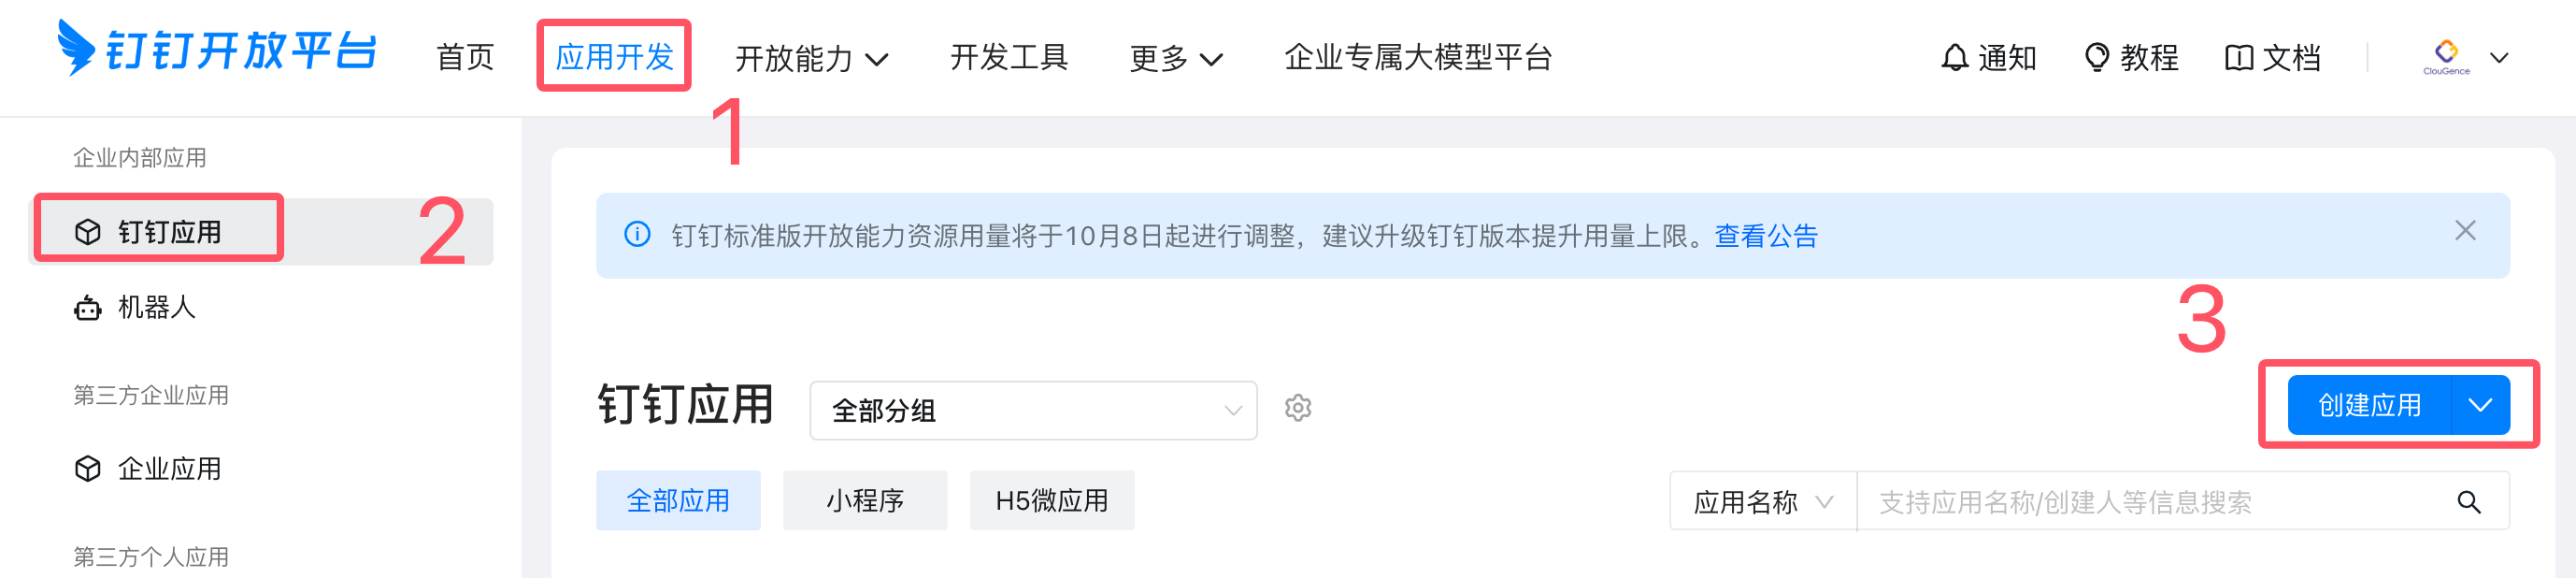
- Open App Development > DingTalk Apps > Create App.
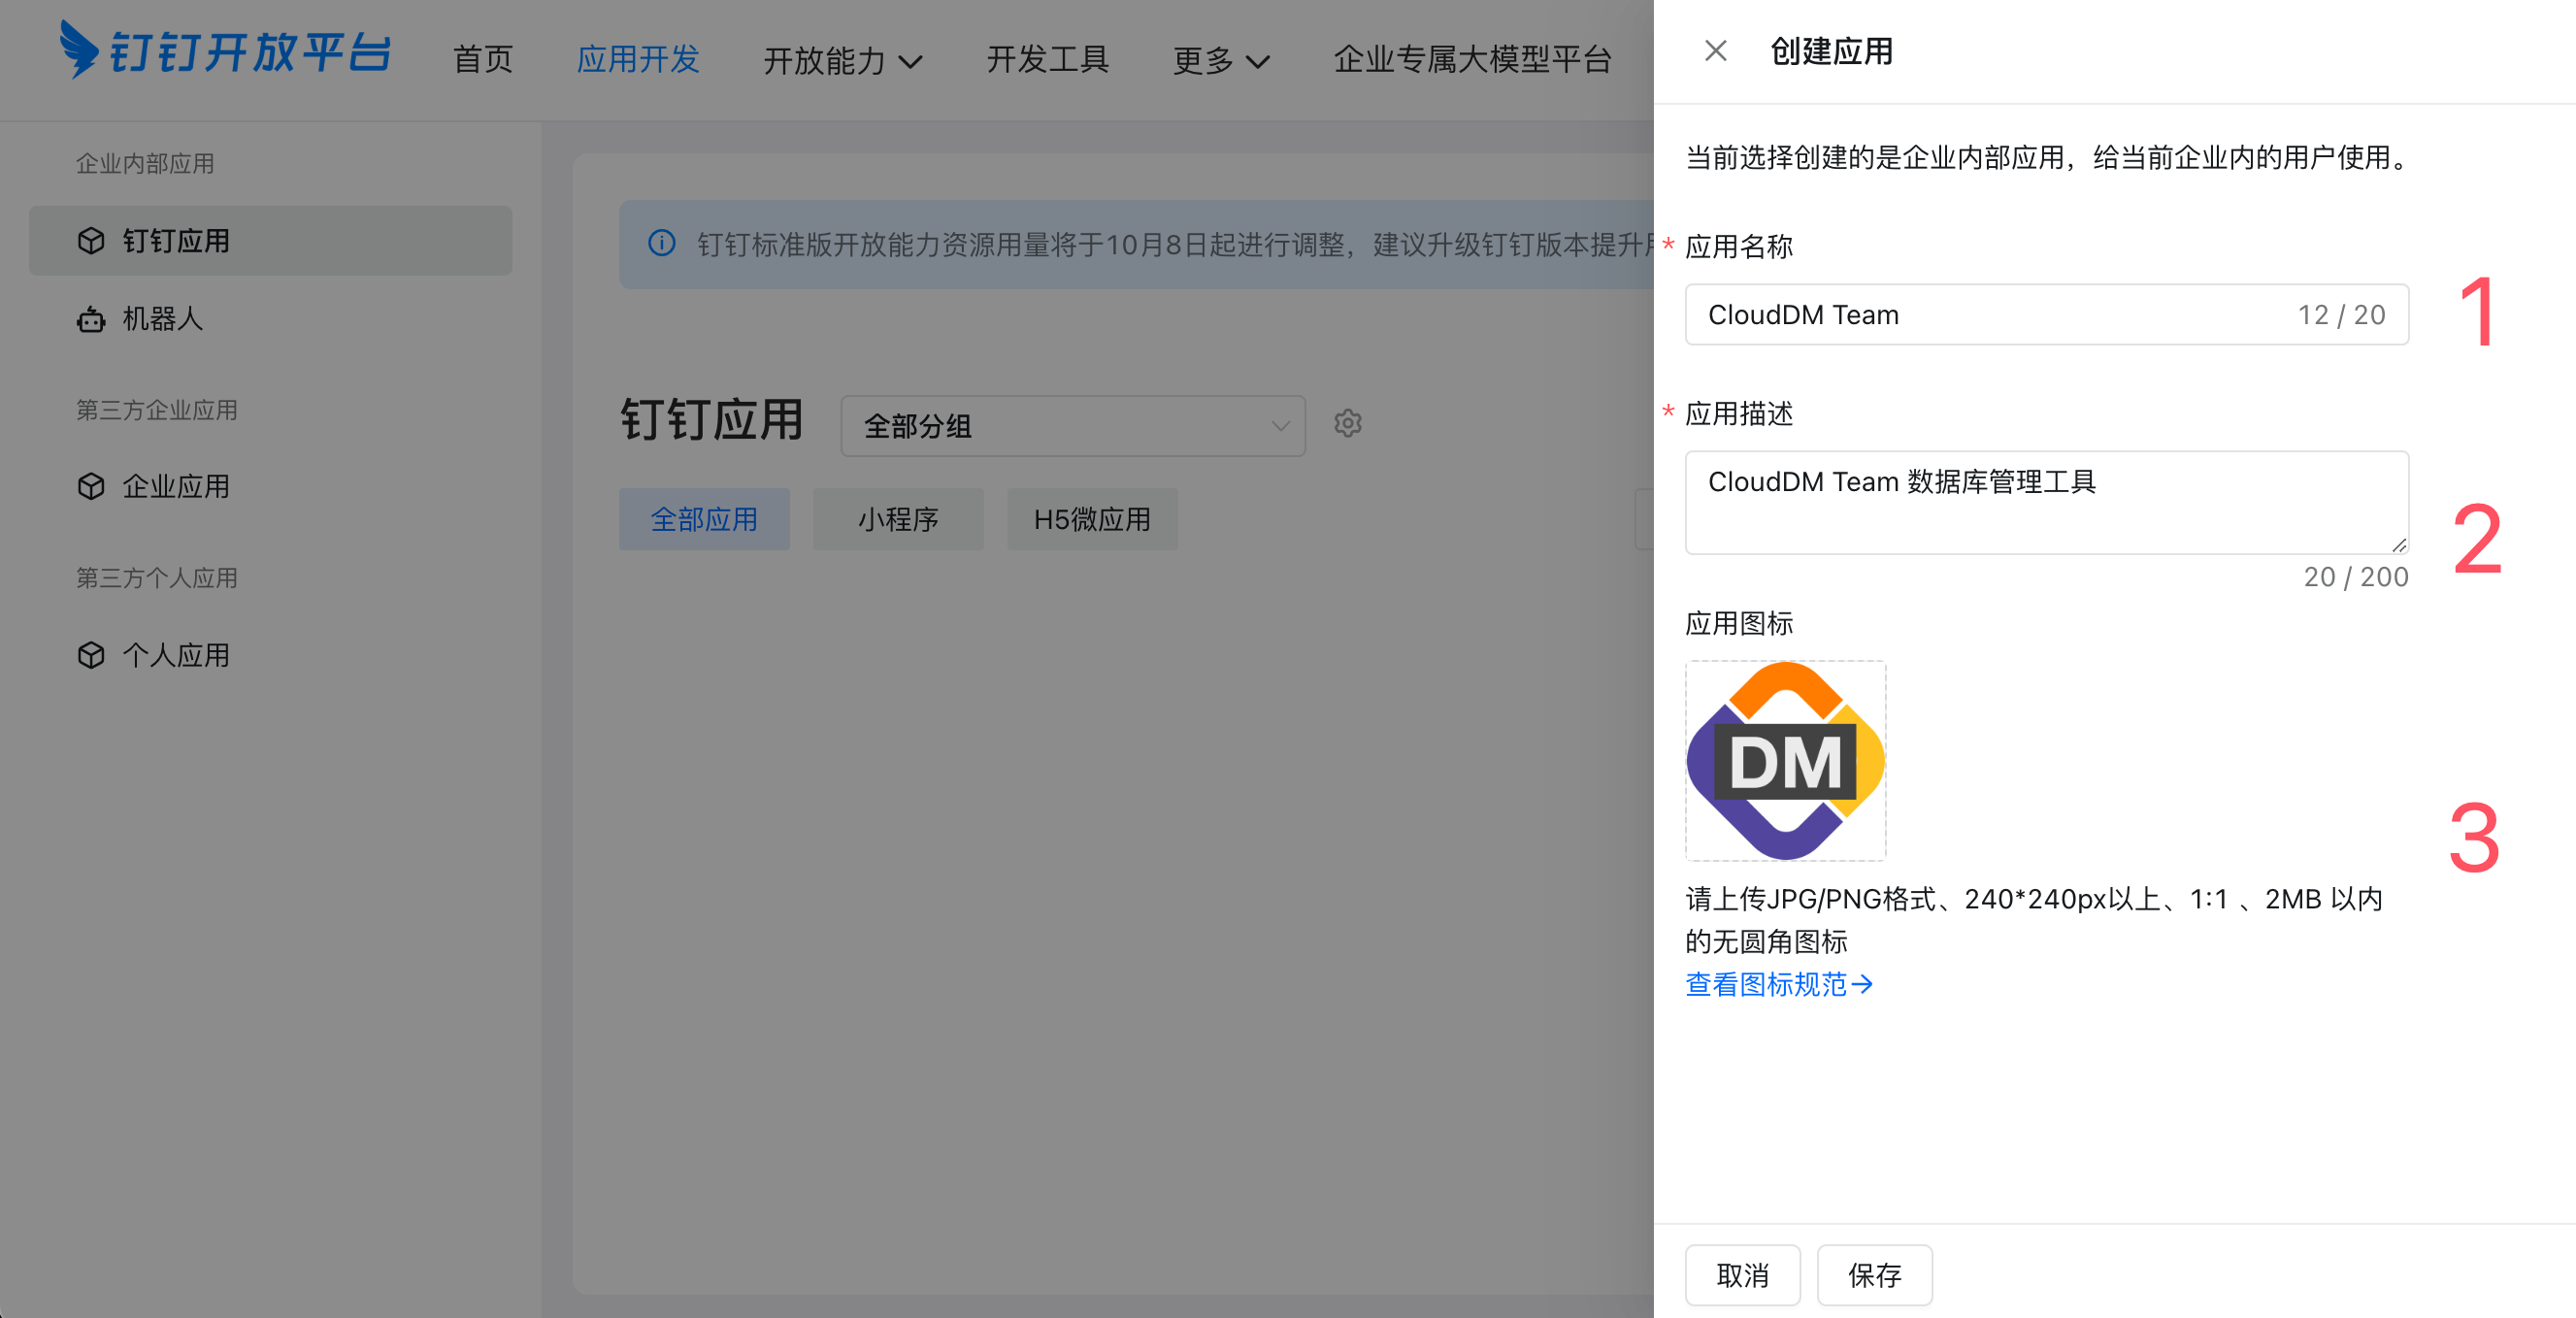
- Enter the app details and click Save. App icons are available under Resource downloads.
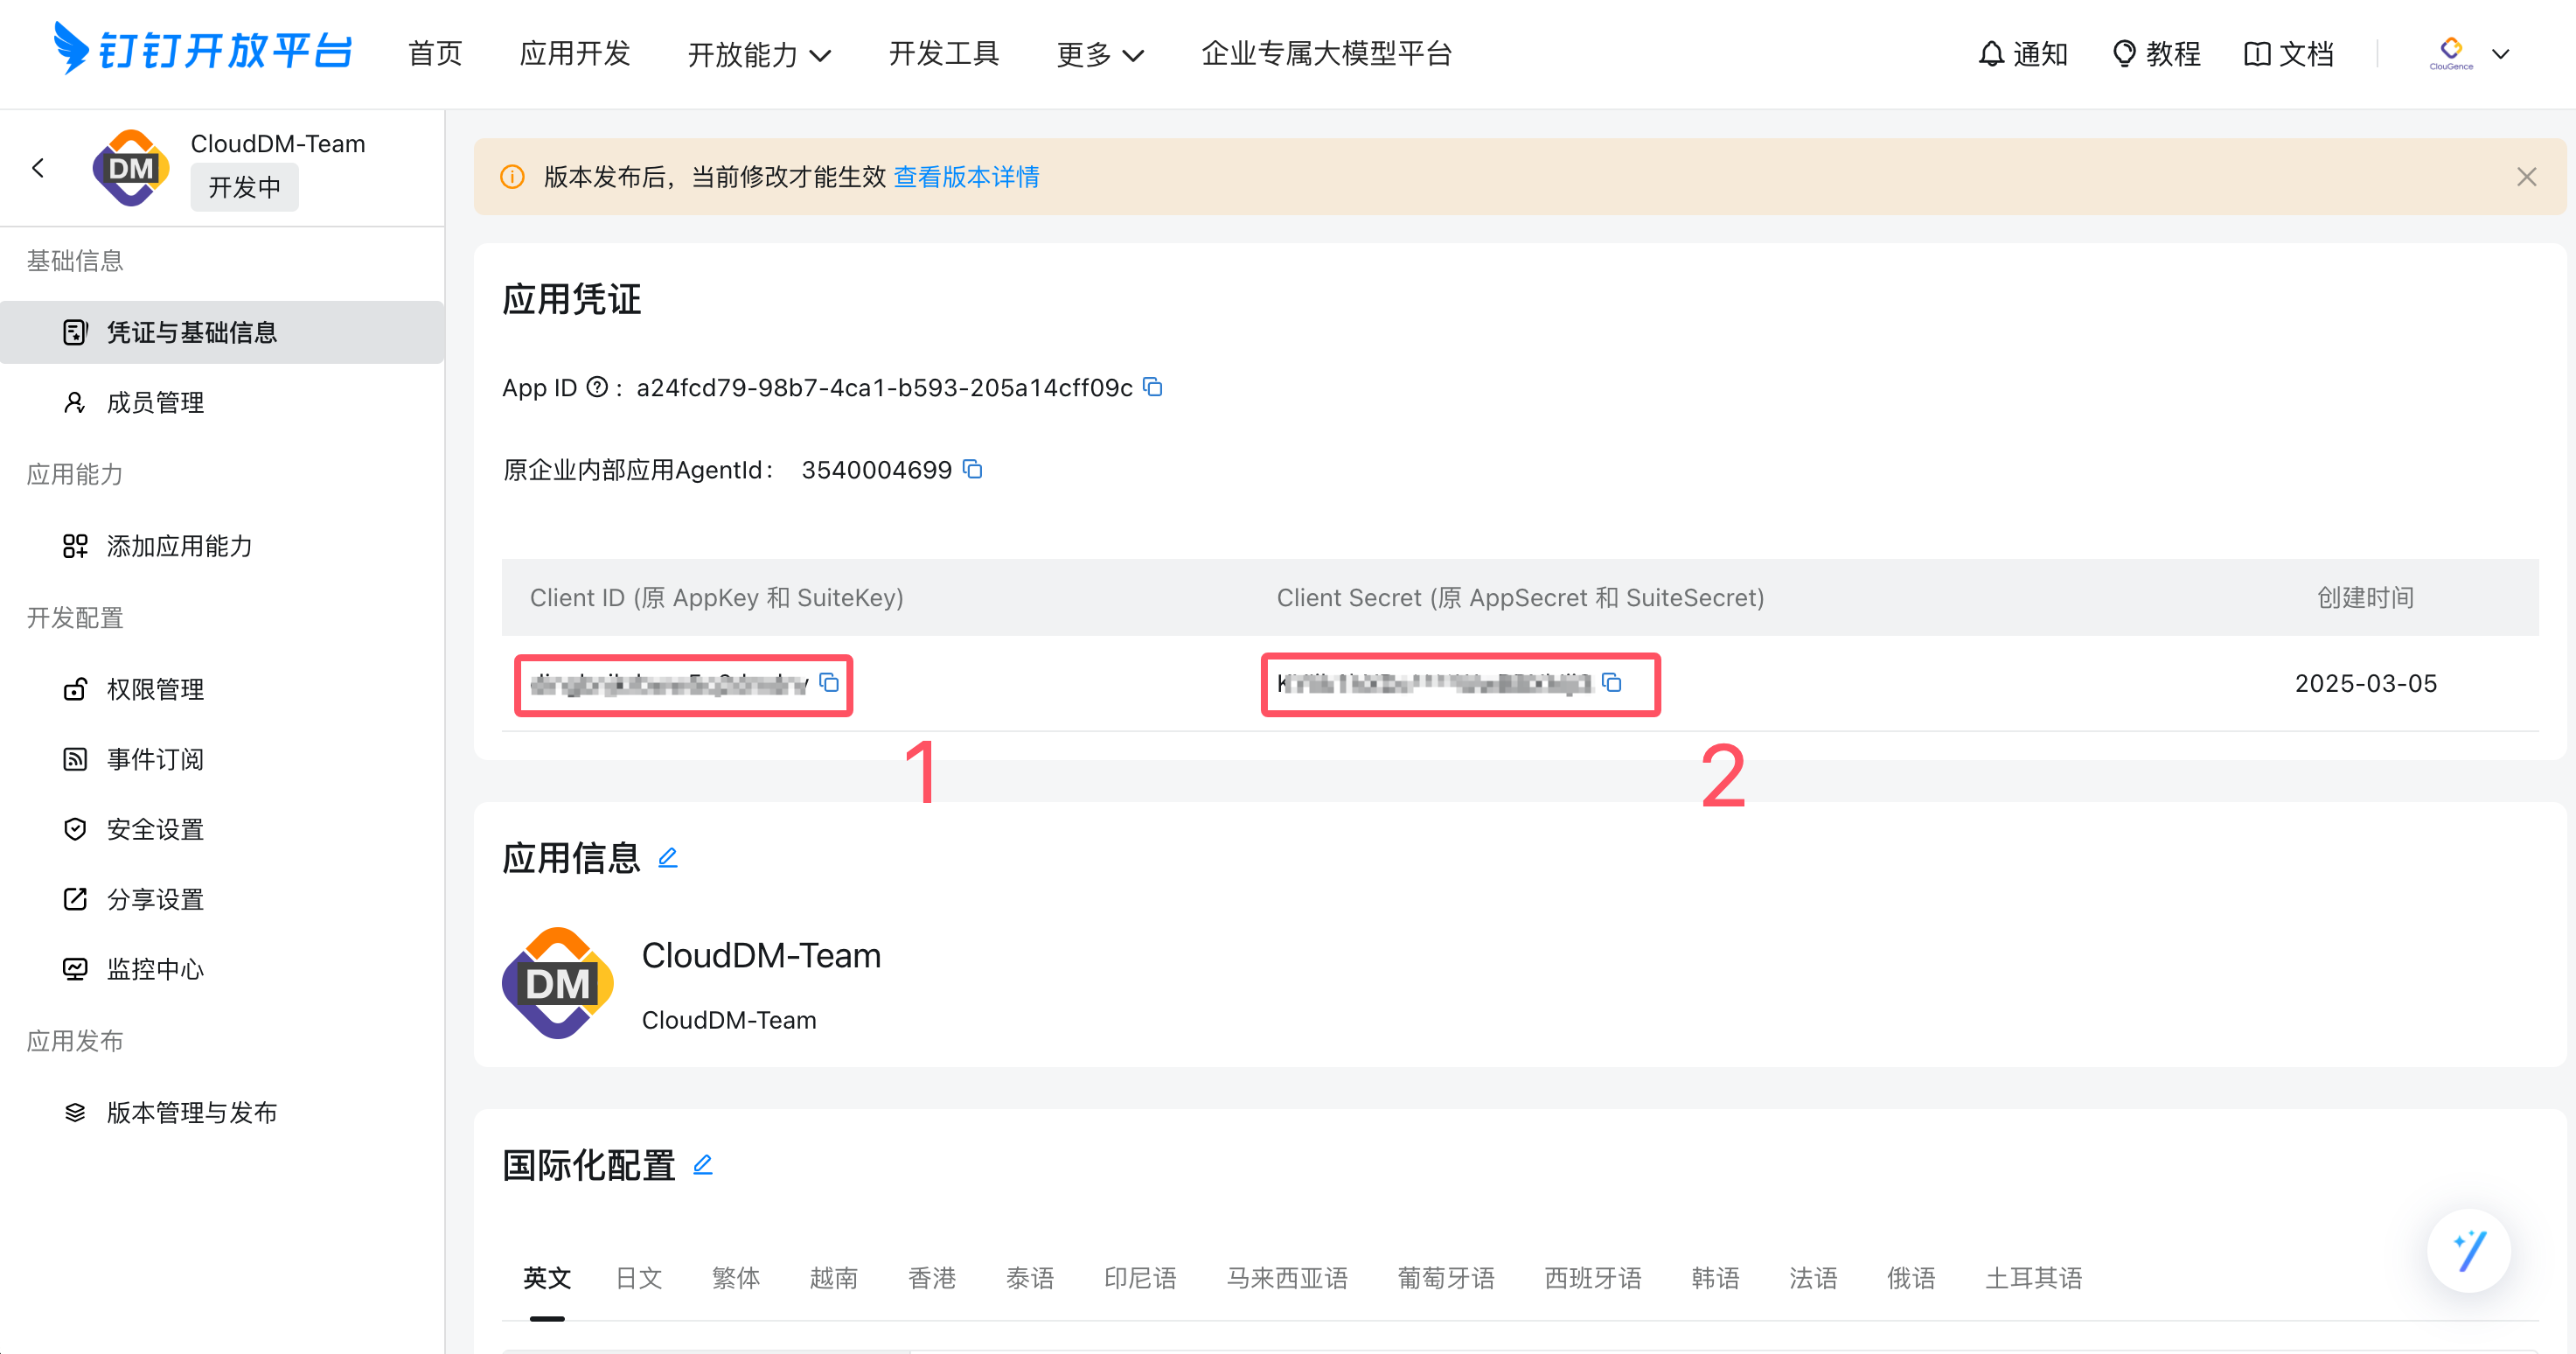
- Open Credentials and Basic Information. Enter the Client ID and Client Secret in CloudDM as AppKey and AppSecret, respectively.
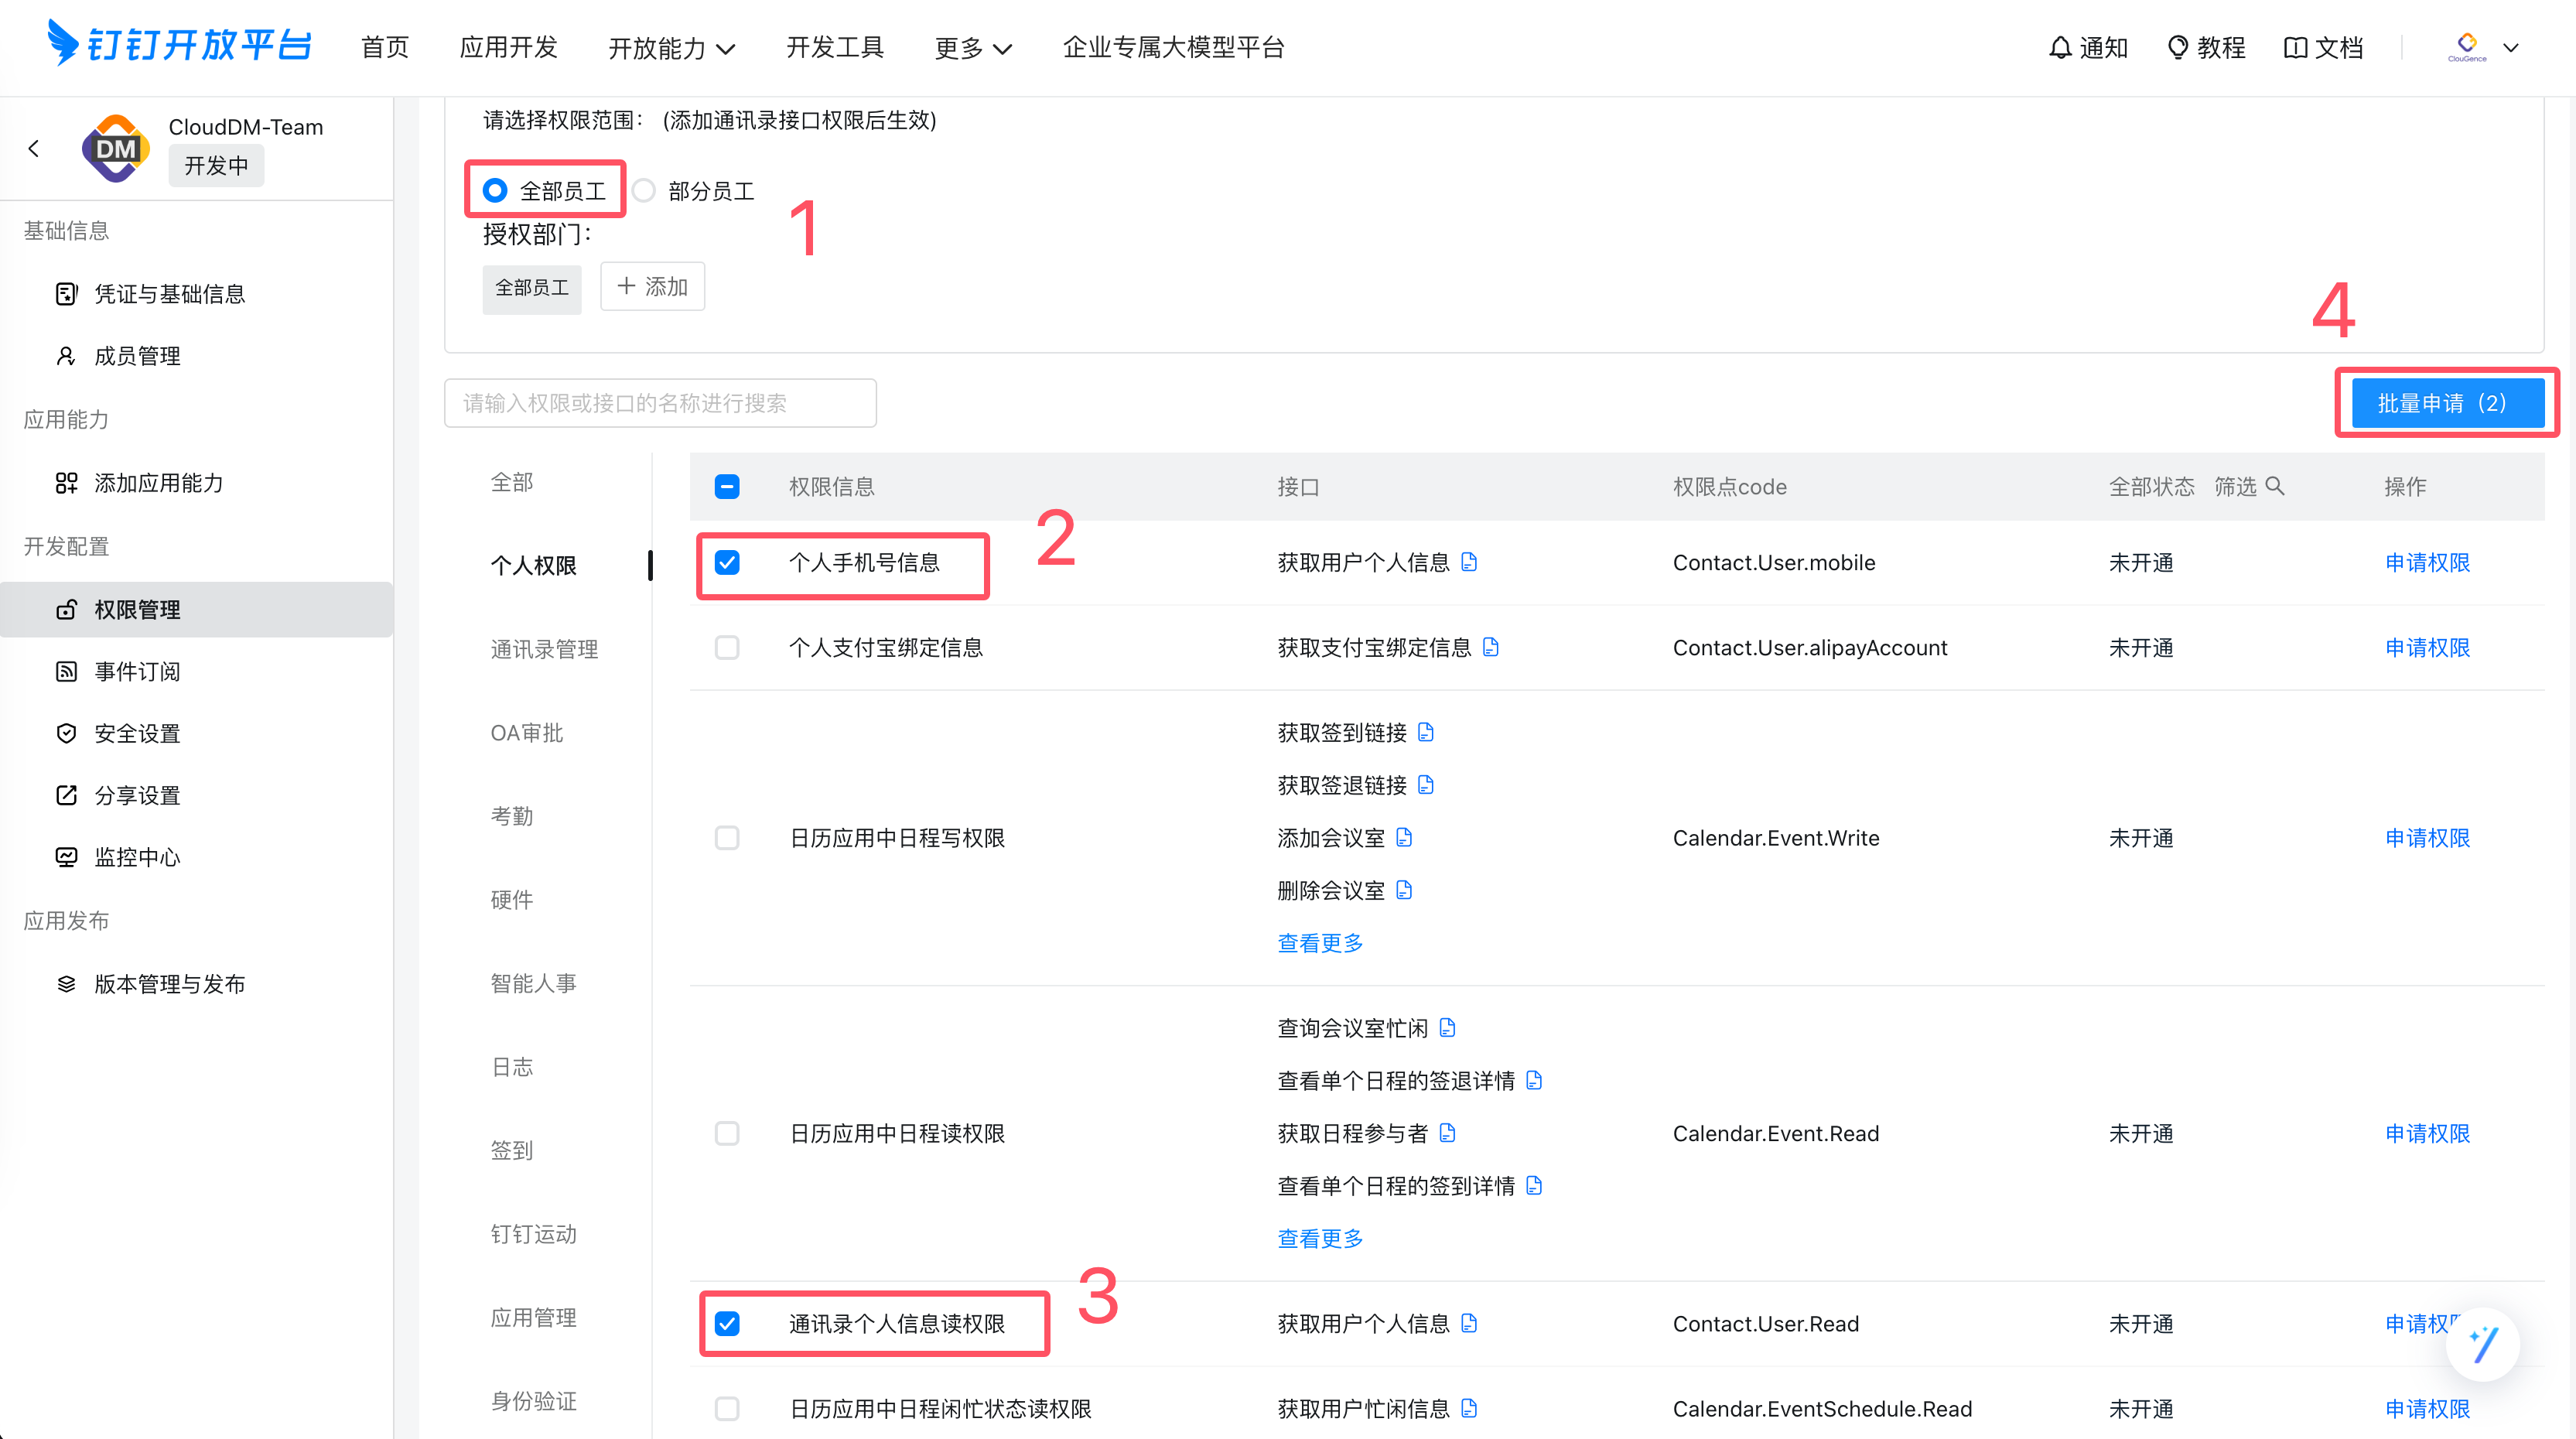
- In Permission Management, grant the permissions required for sign-in.
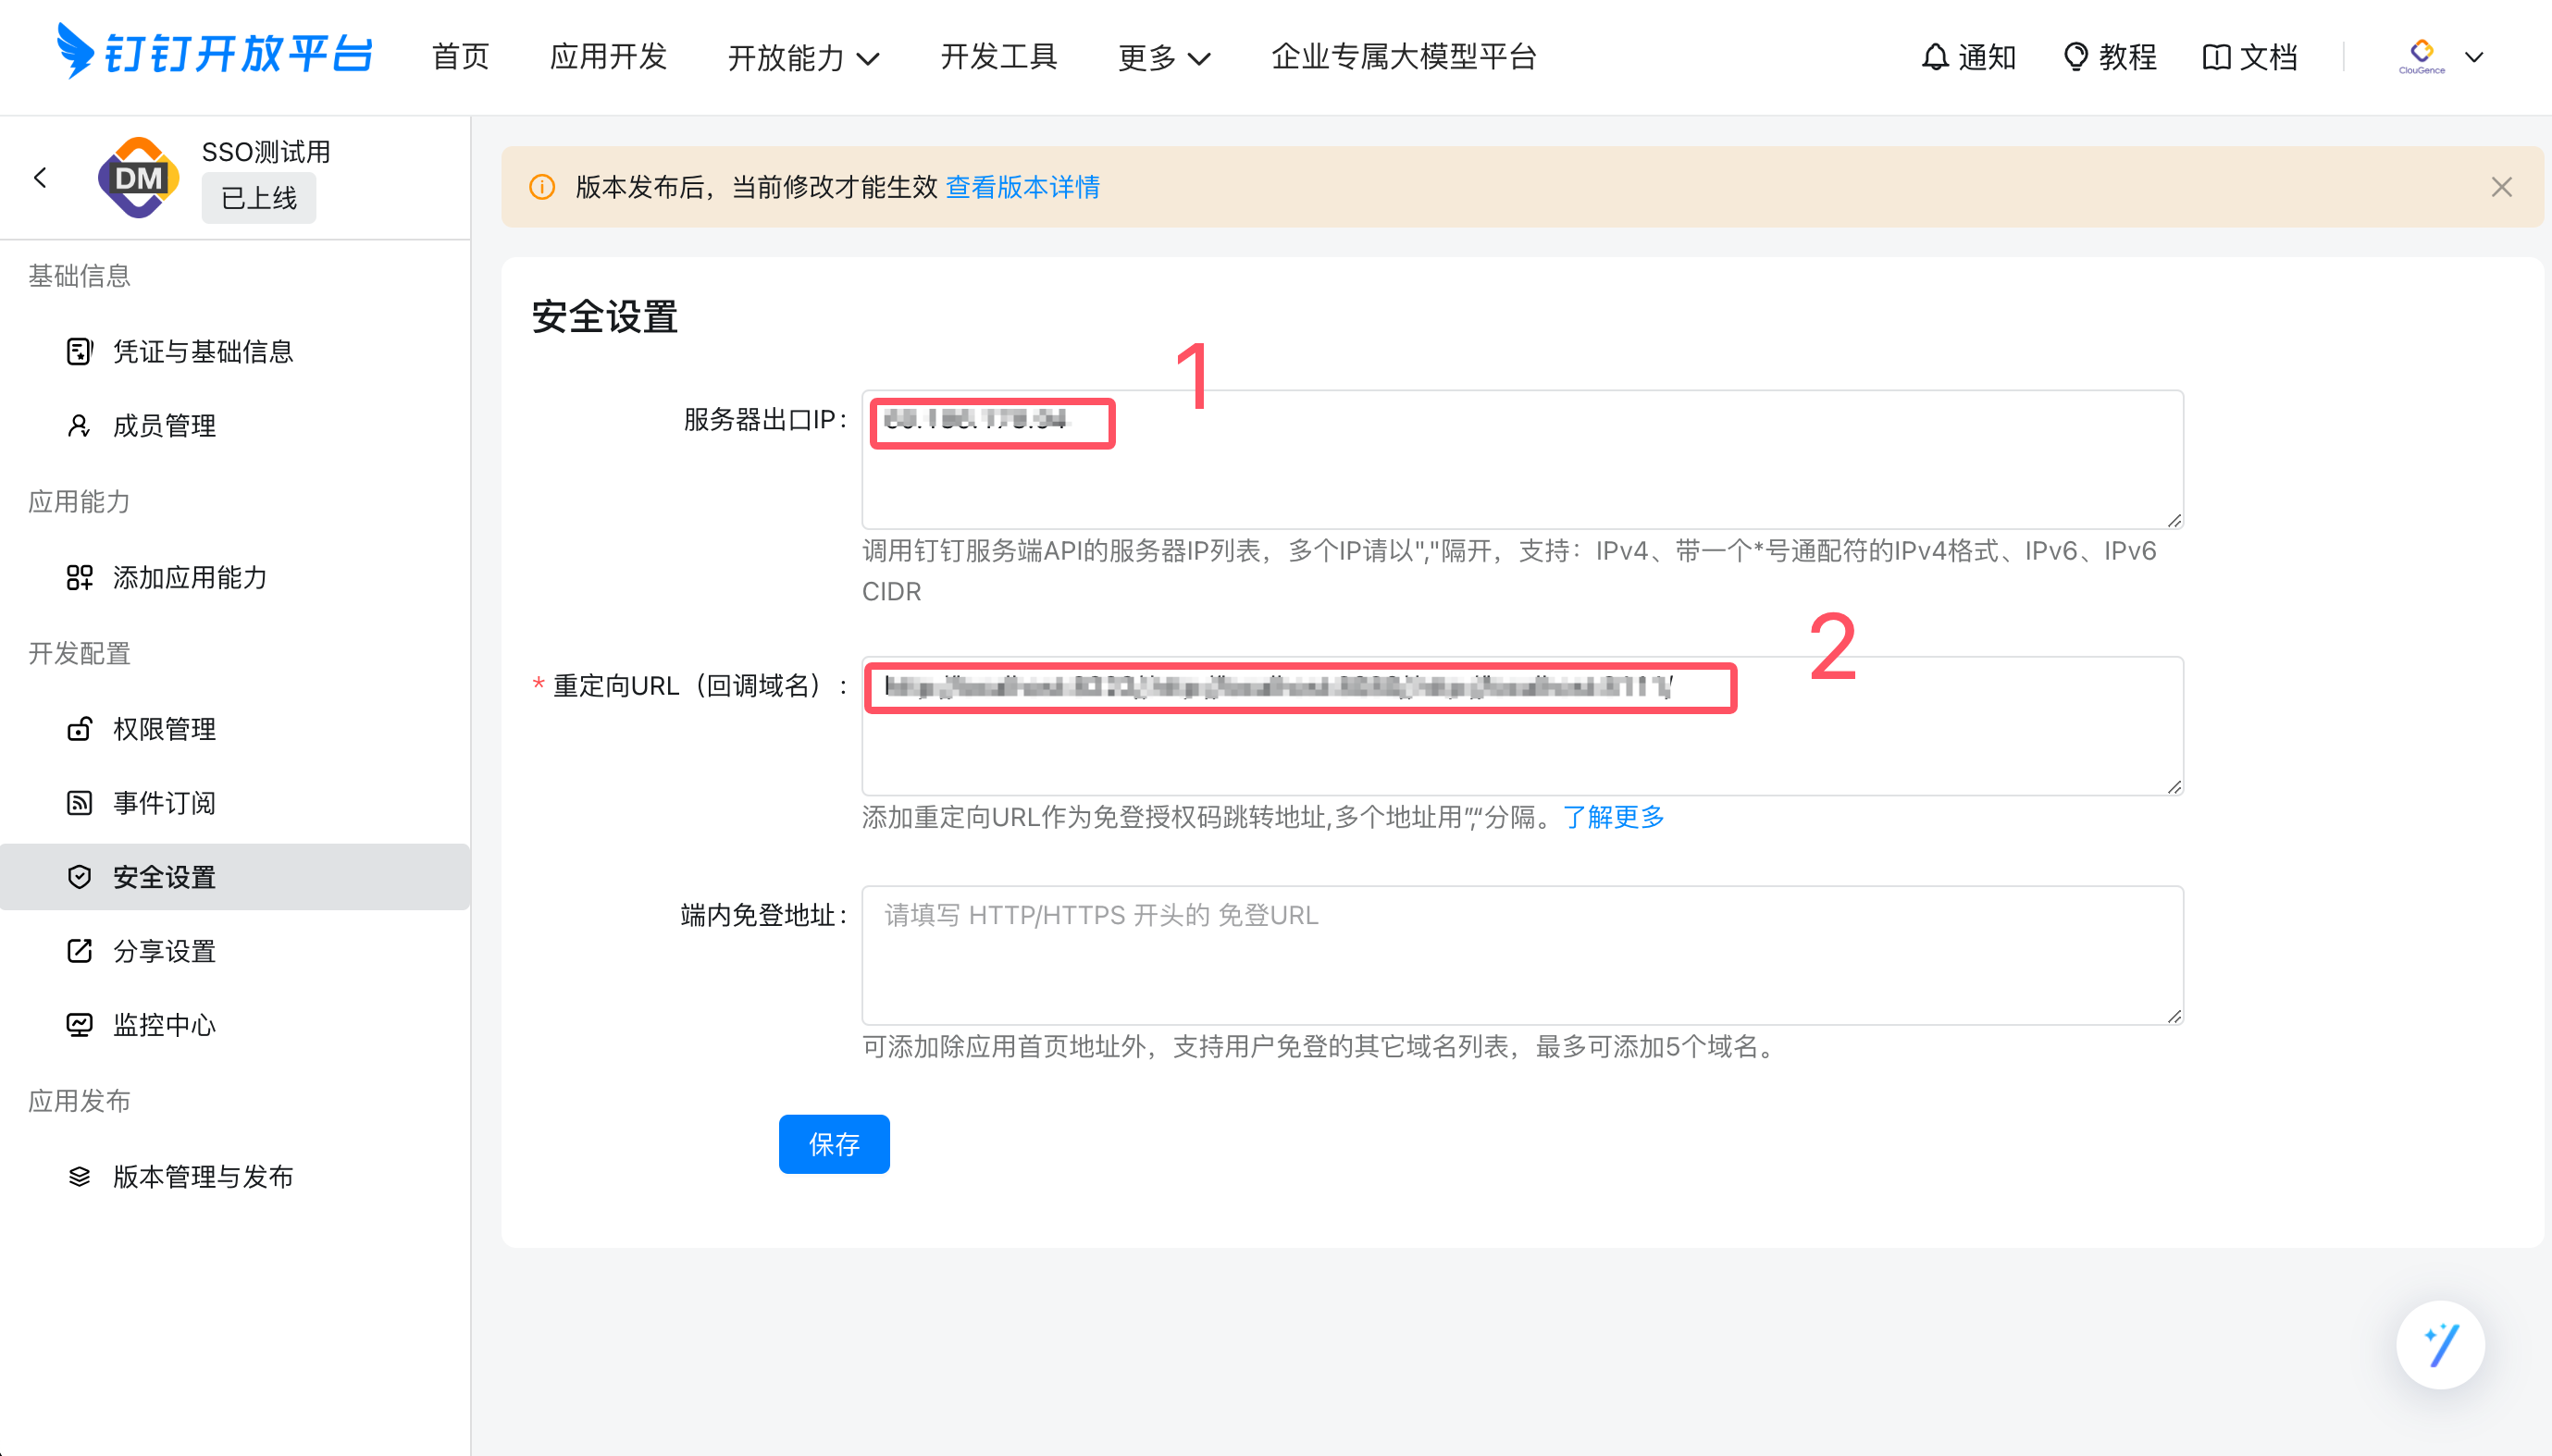
- In Security Settings, configure the public outbound IP address of the CloudDM server and its access URL. Include the port when it differs from 80.
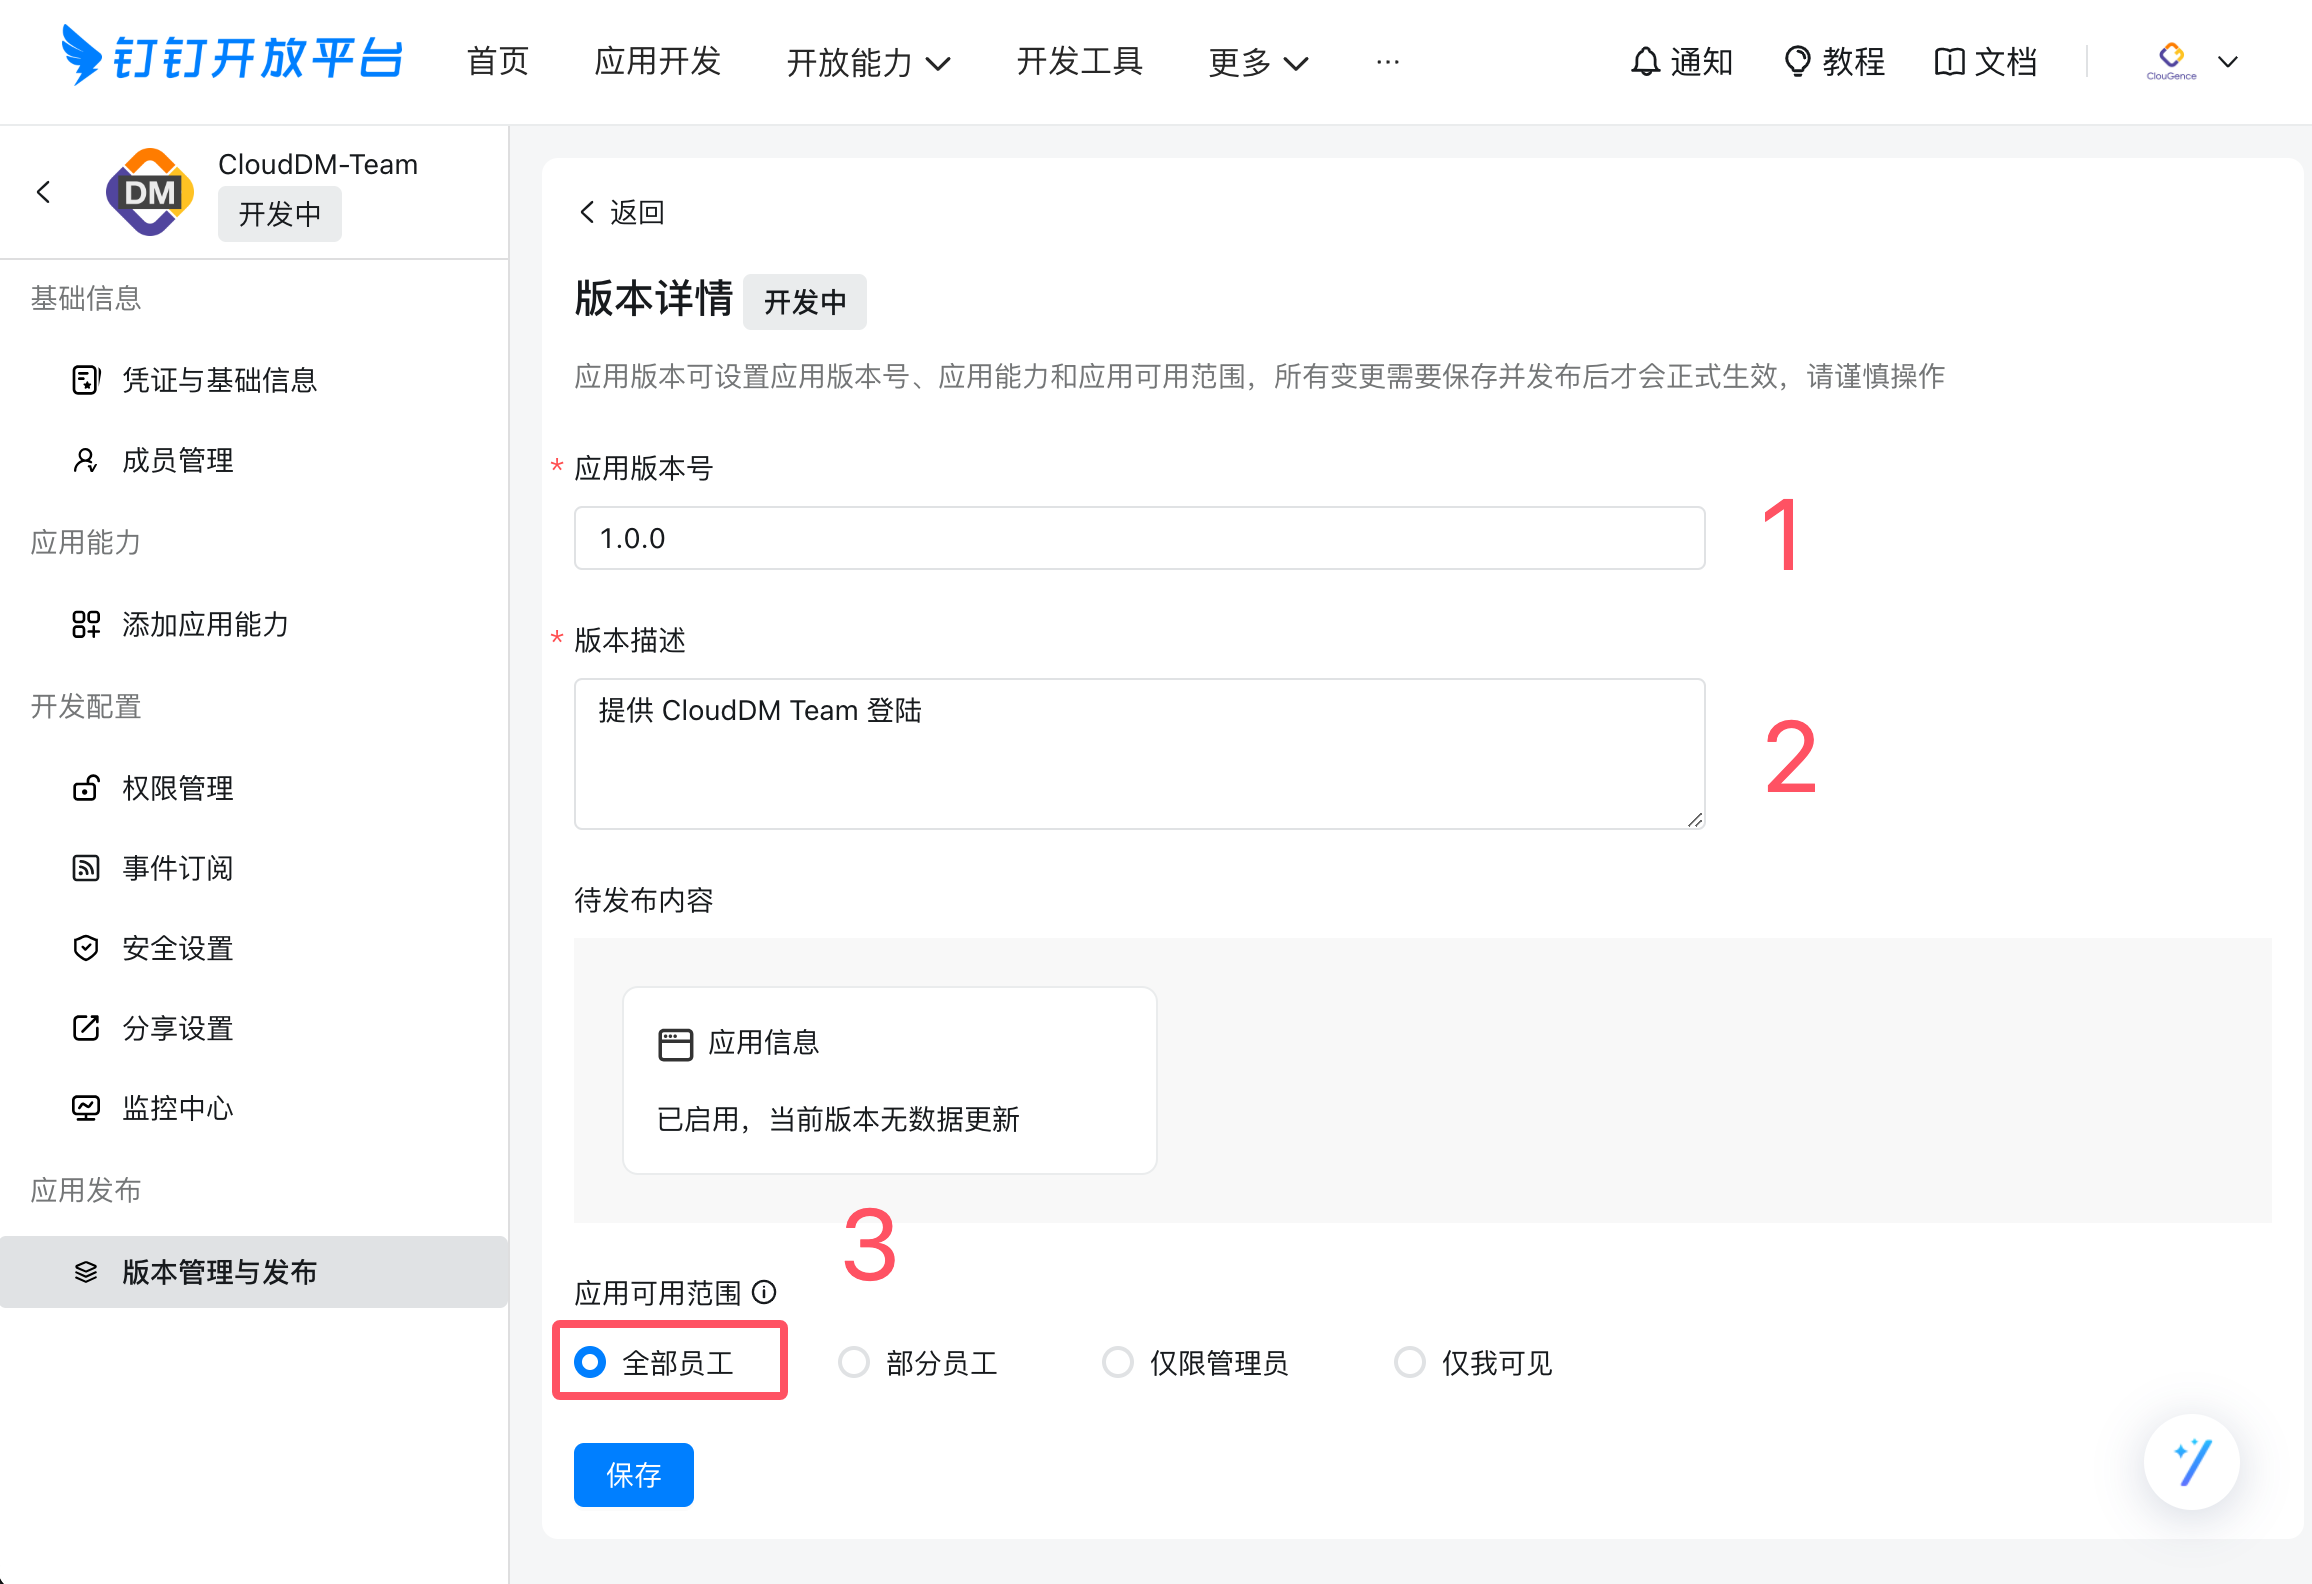
- In Version Management and Release, publish the app and set who can use it.